Update Nov 2, 2020: It’s been over a year and a half since I first published this Phoenix LiveView tutorial. Since then a lot has changed with the library. I’ve now updated the entire tutorial to work with Phoenix 1.5 and Phoenix LiveView 0.14. The new generators will let you get up and running a lot faster. As always let me know on Twitter if there’s anything you don’t understand or want me to cover more in depth!
I previously released a pretty basic Phoenix LiveView tutorial where we made a simple counter that you could increment and decrement. Phoenix LiveView is a great solution for anyone who wants to get a real-time app out to the world quickly without spending a ton of time building out both frontend and backend. Today I want to show you just how simple it can be to build something that is a little more useful than a counter: a todo list. Because we’re building it to be database backed, you could use this same pattern for business applications to add real-time functionality without much overhead.
Since this is a tutorial for a bigger project, I’ve created the entire thing on GitHub as well. If you prefer you can see the code there. If you click the Octocat (Github logo) next to any of the section titles, it will take you to the corresponding commit so you can check what you have against the full codebase there.
New LiveView Project
To start out, set up a new project with Phoenix LiveView. Thanks to the changes to the generator in Phoenix 1.5, all of the LiveView boilerplate will be added for you when you generate a new project. First, make sure you have the latest version of the generator:
mix archive.install hex phx_new
As of the time of writing, version 1.5.4 is the latest. With it installed, you
can create a new project. Including the live flag will include all the
boilerplate necessary to get LiveView up and running:
mix phx.new live_view_todos --live
Use Y to download and install dependencies, and then cd into the new project
directory and setup its database:
mix ecto.setup
And now you can start your server, and go to http://localhost:4000 in your browser to see your application running
mix phx.server
Generate the Schema
With your basic project up and running, you’ll want to create the table for the todos. Since there are already plenty of great Phoenix tutorials out there, I’m going to skip over how to build out our data schema manually. Just use the Phoenix generator to do that quickly:
mix phx.gen.context Todos Todo todos title:string done:boolean
Then migrate your database:
mix ecto.migrate
That should be everything you’ll need from the database standpoint, as well as all the functions you’ll need to work with your database. Now you’ll create an interface for interacting with the todo list.
Set up the page
I always like to start from the top level when creating a page and work down to the lowest level. So let’s start at the router. You should have a route that looks like this:
live "/", PageLive, :index
Replace that route with a new one for the todo list:
live "/", TodoLive, :index
If you try to run your app, you’ll see a compilation error because TodoLive
doesn’t exist yet. Go ahead and create a new file at
lib/live_view_todos_web/live/todo_live.ex. Implement the standard mount
callback, and use the render callback to render an example string inline:
defmodule LiveViewTodosWeb.TodoLive do
  use LiveViewTodosWeb, :live_view

  def mount(_params, _session, socket) do
    {:ok, socket}
  end

  def render(assigns) do
    ~L"Rendering LiveView"
  end
end
Now if you start your server again with mix phx.server and open your browser
to http://localhost:4000, you should see “Rendering
LiveView” on the page. Awesome! Except now let’s do something with it.
Display the Todo List
On mount, you should load in your todo list so that the live view can render them. Update your mount function to look like this (make sure you don’t forget the alias):
alias LiveViewTodos.Todos

def mount(_params, _session, socket) do
  {:ok, assign(socket, todos: Todos.list_todos())}
end
Now the live view process will have the list of todos, but it isn’t actually
displaying them. Create a LiveEEx file to do that. Add a new template file at
lib/live_view_todos_web/live/todo_live.html.leex. In it you’ll just add code
to display the list of todos from the database:
<%= for todo <- @todos do %>
<div><%= todo.title %></div>
<% end %>
Previously you would have needed to also create a view module and change your
render callback to call the view and tell it to render the template. Thanks to
some new Phoenix magic though, a template in the same folder as the live view
code that has the same name will be used automatically. For a large project with
many live views and templates, this might not be the easiest way to organize
things, but because this project is smaller, go ahead and take advantage of it
by removing the render implementation from your live view module so that only
the mount callback remains.
Now if you refresh your page, you’ll see that that it’s blank below the header. That’s because there aren’t currently any todos to display. So let’s enable adding new todos to the list.
Create a Todo
To start add a new form to the top of your template:
<form action="#" phx-submit="add">
  <%= text_input :todo, :title, placeholder: "What do you want to get done?" %>
  <%= submit "Add", phx_disable_with: "Adding..." %>
</form>
There’s a few things to break down there. The first is the phx-submit
attribute in the <form> element. This instructs LiveView to send an add
action to the server that contains the contents of the form when it is
submitted. The phx_disable_with attribute on the submit button is a nice
LiveView feature that will disable the button when the form is submitted and
change its text to Adding... so that the user won’t submit it more than once.
If you try clicking that button now, nothing will happen in the browser, and
you’ll see an error in the console:
** (UndefinedFunctionError) function LiveViewTodosWeb.TodoLive.handle_event/3 is undefined or private
  (live_view_todos) LiveViewTodosWeb.TodoLive.handle_event("add", %{"todo" => %{"title" => ""}}, #Phoenix.LiveView.Socket<...>)
  ...
That’s because you haven’t set up a handler for the form. You can use the second
line of the stacktrace to set up the new function in the live view. Create a new
handle_event function that’s watching for an add event and then takes the
todo information that’s passed in and creates a todo. Then you’ll tell it to
load the list of todos again so that the list will be re-rendered. Since you’re
already doing that in mount, go ahead and refactor that into a private function
called fetch:
def mount(_params, _session, socket) do
  {:ok, fetch(socket)}
end

def handle_event("add", %{"todo" => todo}, socket) do
  Todos.create_todo(todo)

  {:noreply, fetch(socket)}
end

defp fetch(socket) do
  assign(socket, todos: Todos.list_todos())
end
Now if you type a new title into the input and hit enter or click the Add
button, you’ll see that it shows up in the list below! What’s cooler than a list
that updates itself without us writing any Javascript? You can make it work
across multiple sessions so that if you and I are both looking at the same todo
list, you can add a new item and it will show up for us both.
Updating in Real-Time with PubSub
While Phoenix LiveView is the star of the show in this tutorial, its older sister Phoenix PubSub is doing a lot of the heavy lifting behind the scenes. In case you haven’t used Phoenix PubSub before, it allows you to set up subscriptions in your app to listen to topics and handle events when they occur. Since the process that manages the LiveView components won’t necessarily be the process updating the todo list in the database, we’ll want to have the LiveView process subscribe to updates to the todos table.
Phoenix PubSub comes bundled in Phoenix by default, so all you have to do is use
it. To start off, add a function in lib/live_view_todos/todos.ex to enable
subscribing. Use the module name as our PubSub topic:
@topic inspect(__MODULE__)

def subscribe do
  Phoenix.PubSub.subscribe(LiveViewTodos.PubSub, @topic)
end
Now go ahead and add a call to that function into the mount callback of your
live view so that processes will get subscribed on mount:
def mount(_params, _session, socket) do
  Todos.subscribe()

  {:ok, fetch(socket)}
end
Now that the process is subscribed, it will need to handle the events that come
in. This can be implemented with a handle_info callback that looks like this:
def handle_info({Todos, [:todo | _], _}, socket) do
  {:noreply, fetch(socket)}
end
Notice the callback is matching on an event from the Todos topic since you
used the module name for the topic name when you created it. Then it’s expecting
an event key that has :todo as the first element in a list. If you want to get
fancy, you could try diffing the todos yourself. With the intent of keeping this
tutorial as simple as possible, we’ll stick to just loading them from the
database each time though.
Now that the live views are subscribed to the topic and handling events, you
need to actually broadcast events to them. Go back to the Todos context and
create a new function that will broadcast whenever a change occurs:
defp broadcast_change({:ok, result}, event) do
  Phoenix.PubSub.broadcast(LiveViewTodos.PubSub, @topic, {__MODULE__, event, result})

  {:ok, result}
end
And to make this all work, modify all of the functions in the context that will
mutate data in the database so that they will call your new broadcast_change
function:
def create_todo(attrs \\ %{}) do
  %Todo{}
  |> Todo.changeset(attrs)
  |> Repo.insert()
  |> broadcast_change([:todo, :created])
end
...
def update_todo(%Todo{} = todo, attrs) do
  todo
  |> Todo.changeset(attrs)
  |> Repo.update()
  |> broadcast_change([:todo, :updated])
end
...
def delete_todo(%Todo{} = todo) do
  todo
  |> Repo.delete()
  |> broadcast_change([:todo, :deleted])
end
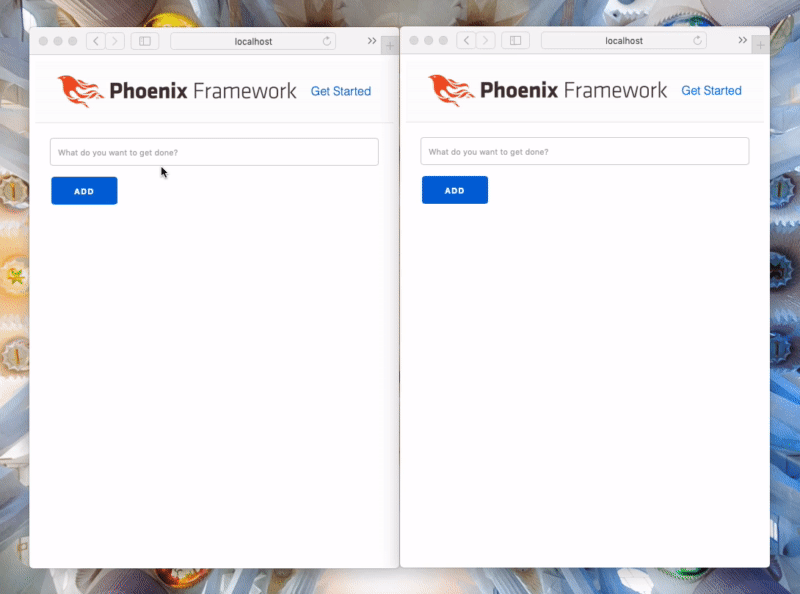
And that’s all there is to it! Now if you open the app in a second window, you
can add new todos to the list and see that they’re being added in real-time in
both windows. Any time there is a change in the Todos context, it’s being
broadcasted out. The live view processes listen to those changes, and then send
the update down to the client in real-time. I don’t know if there has ever been
a way to build something like this with so little effort.
Marking Items as Done
Now that you’re properly creating and reading the list of todos, let’s give updating a shot. Since it’s a todo list, you really ought to be able to mark items as done right? To start with, modify the LiveEEx template to show a checkbox next to each todo item. Swap out this line:
<div><%= todo.title %></div>
for this:
<div>
  <%= checkbox(:todo, :done, value: todo.done) %>
  <%= todo.title %>
</div>
You’ll notice that the checkbox value will be specifically handled by
todo.done. This will now display whether or not an item is done. Try toggling
one or two via psql (UPDATE todos SET done = TRUE WHERE id = 1;) and refresh
the page; you’ll see that its box will get checked. But you want to be able to
update those values using the checkboxes. Modify that checkbox line in your
template to add some more attributes:
<%= checkbox(:todo, :done, phx_click: "toggle_done", phx_value_id: todo.id, value: todo.done) %>
Now your checkbox will have a phx_click as well as a phx_value attribute.
You may remember this from my last tutorial, but in case you don’t, phx_click
adds a click handler to an item. Now when the checkbox is clicked, LiveView will
send an event to the server. I didn’t previously cover phx_value_* though. It
will allow you to specify values that get sent to the server with the event. To
see this in action, go ahead and save your new template and then click on one of
our checkboxes. You should see an error like this in your terminal where your
application is running:
** (FunctionClauseError) no function clause matching in LiveViewTodosWeb.TodoLive.handle_event/3
    (live_view_todos) lib/live_view_todos_web/live/todo_live.ex:11: LiveViewTodosWeb.TodoLive.handle_event("toggle_done", %{...}, #Phoenix.LiveView.Socket<...>)
If you look at that second line, you’ll see that it’s trying to call
LiveViewTodosWeb.TodoLive.handle_event and pass the parameters
"toggle_done", a map of values including one called "id" set to the ID of
the task you clicked on, and the socket. Go ahead and implement a handler for
this in your live view:
def handle_event("toggle_done", %{"id" => id}, socket) do
  todo = Todos.get_todo!(id)
  Todos.update_todo(todo, %{done: !todo.done})
  {:noreply, fetch(socket)}
end
A few things are happening there. First the live view uses the ID it receives
from the phx_value_* attribute and fetches the todo from the database. Then it
updates that todo and sets its done property to the opposite of whatever it
was before (if it was false, it’s now true, and vice versa). Then you’ll notice
that the process reloads the list of todos from the database and sends them back
down to the application. One more thing though: the PubSub subscription should
already be telling our socket to fetch all the new todos, so you don’t need to
do that here. Go ahead and remove the call to fetch from the new event
handler. You can do the same with the add event too:
{:noreply, socket}
Now if you try checking (and unchecking) a few boxes, you’ll see that they update in real-time, even across multiple browser windows!
What’s Next?
Well there you have it! A simple todo list with Phoenix LiveView that didn’t take too long to implement. Like I said before, LiveView is awesome, and Phoenix PubSub is pretty amazing too. It was super simple to subscribe to events and publish those when you update the database, and that allowed you to get this all set up really easily. I would highly recommend spending some time getting more familiar with PubSub because it can be a very powerful tool in your arsenal as you build real-time applications.
If you want to keep going with this project, the next thing I would recommend is
adding a delete functionality. The Todos context already has a delete_todo
function that you can make use of, so you can probably use what you just did with
the checkbox as a template. If you do anything further, please reach out to me
on Twitter and let me know what you did. I’d love
to see the things you’re building as a result of these tutorials.
If you liked this, please retweet it so others can find it and subscribe to my YouTube channel so you get notified of my next post. I plan to continue releasing new YouTube videos with accompanying blog posts whenever I can make time. Let me know on Twitter or in the comments for the video above if there is anything further you’d like to see me cover. Thanks for reading!