This is part 1 of a series on working with Ecto associations in Phoenix LiveView. To get updates when I release the next part, please subscribe to my channel on YouTube and enter your email at the bottom of this post to subscribe to email updates.
To start, I want to apologize for being MIA for the past couple months. I got married at the end of July, so I was doing quite a bit with that over the past few months. I still have a reception coming up in Washington State this weekend, but after that I should be able to get back to a more regular cadence. Thanks for understanding!
With that said, this will be the start of a new series. Almost a year and a half ago, I gave a talk about Ecto at LoneStar ElixirConf. Originally, I had planned to speak mostly about how to model Ecto associations, but ended up speaking more about upserting data. I got a comment on my last post asking me to talk about Ecto associations, so I’ve decided that I want my next series to cover that. So let’s get started!
Ecto Associations
One of the most important underlying principles of relational databases is that they are made up of tables that are related to each other. These relationships allow you to more easily manage that data by keeping it in separate tables.
In Ecto, these relationships are often called associations. Basically you can have a row in one table that is associated with one or many other types of data in other tables. There are three main types of associations that we will work with:
- One to One
- One to Many
- Many to Many
I won’t go too into detail on these, but if you aren’t super familiar with relational database design, database.guide has pretty good articles on what a relationship is and on the three types of relationships. Each post in this series will cover one of the three types of assocations and how we can use it in our database and manage it with Phoenix LiveView.
Our Example
For all three parts of this series, we will be working with the example of an admin panel doing user administration. LiveView would be helpful in this case because we would be able to automatically update the admin panel for all users in case multiple admins are making modifications at the same time.
Normally, this use case probably wouldn’t be worth the effort required to set up real-time functionality, but Phoenix LiveView makes this so simple that it’s definitely worth including.
Before we begin, you’ll want to set up your application with Phoenix LiveView.
Make sure you’re running the latest version of Elixir and Erlang (I’m writing
this post using Elixir 1.9 and Erlang 22) and get the latest version of the
Phoenix generator with mix archive.install hex phx_new. Then you’ll want to
create the project. We’ll just call it user_admin:
mix phx.new user_admin
Now let’s cd into the user_admin directory and get to work. I won’t post all
the steps to get started with Phoenix LiveView to keep this tutorial from going
obsolete for a little while longer, but you can follow them from the LiveView
GitHub page
or follow along in the YouTube video at the top of this post.
One to Many Relationships
In this post, we will be talking only about one-to-many relationships. They tend to be the most common type of relationship that you will model, and can be very useful for maintaining data integrity.
In our example, we will be modeling user roles. In many applications, users can have a role, such as Administrator, Editor, Subscriber, etc. Typically they can only have one role, but each role can be given to many different users. Because of this, users and roles would best be defined as having a one-to-many relationship. This means one role can be associated with many users. You can also see it the other way around as many different users each have just one role.
Our data model for this example will look something like this:

If you have any further questions about this, please let me know on Twitter so that I can hopefully clarify it for you better. Otherwise, let’s go ahead and set up our database.
Database Migrations
When you set up a one-to-many relationship in a database, typically
what you’re doing is adding a foreign key (an ID that corresponds with the ID of
a row in a different table) into the table that makes up the “many” in the
relationship. If you refer to the diagram above, in this case we’ll have a
role_id field in the users table that refers to the id field in the
roles table.
In order to properly set up that foreign key, Postgres requires us to have the
“one” table, in this case roles, created before we can create the foreign key
in the “many” table. So let’s start by creating our roles table. I recommend
leveraging the Ecto generators to do this:
mix ecto.gen.migration create_roles
That should create a migration file for you in the priv/repo/migrations
directory. Let’s open up this migration file and create the table. Ecto will
automatically generate the id column for us so we only need to add the name
column:
defmodule UserAdmin.Repo.Migrations.CreateRoles do
  use Ecto.Migration

  def change do
    create table(:roles) do
      add :name, :string
    end
  end
end
After saving that go ahead and run mix ecto.migrate and make sure that the
roles table is created correctly. Then we’re ready to add our users table.
Let’s use the generator again:
mix ecto.gen.migration create_users
If you open the newly generated migration file, we’ll want to create that table
and give the user a name. We will also add our role_id column that will
reference the role of the user. This will tell Ecto that we want to create a
foreign key constraint in our database to make sure that user roles are always
valid roles that exist in the roles table.
defmodule UserAdmin.Repo.Migrations.CreateUsers do
  use Ecto.Migration

  def change do
    create table(:users) do
      add :name, :string
      add :role_id, references("roles")
    end
  end
end
Go ahead and run that migration too and our database should now have everything it needs. Now let’s set up the Ecto schemas for handling the data in Elixir.
Schemas
Let’s work with the context pattern and create a context at
lib/user_admin/users.ex. For now we’ll just create an empty module:
defmodule UserAdmin.Users do
end
Now we’ll nest our schemas under that. Create two new files:
lib/user_admin/users/role.ex and lib/user_admin/users/user.ex. Let’s start
with role.ex. We’ll use the Ecto.Schema macro to create an Ecto schema, and
then mirror our migration:
defmodule UserAdmin.Users.Role do
  use Ecto.Schema

  schema "roles" do
    field :name, :string
  end
end
And now our user schema. This time we’ll be making a small change. Rather than
directly reference the role_id field, we’ll let Ecto manage the association by
using belongs_to:
defmodule UserAdmin.Users.User do
  use Ecto.Schema
  alias UserAdmin.Users.Role

  schema "users" do
    field :name, :string

    belongs_to :role, Role
  end
end
With that we have all the basic code set up to work with our data. Now let’s get started with the actual LiveView work.
Live View
If you’ve worked with Ecto and databases before, this is where things will start
to get a little more interesting. Let’s start by creating our basic LiveView
boilerplate in lib/user_admin_web/live/user_live/new.ex:
defmodule UserAdminWeb.UserLive.New do
  use Phoenix.LiveView

  def mount(_session, socket) do
    {:ok, socket}
  end

  def render(assigns) do
    ~L""
  end
end
And then let’s hook it up in lib/user_admin_web/router.ex so that Phoenix
knows to use the live view:
defmodule UserAdminWeb.Router do
  ...
  scope "/", UserAdminWeb do
    pipe_through :browser

    live "/users/new", UserLive.New
  end
end
With that you should be able to start your server with mix phx.server and
visit http://localhost:4000/users/new in your
browser to view your new live view. You’ll notice that it’s just the empty
template so far, but that’s because we haven’t added any content yet. So let’s
go ahead and create the template.
The Template
Let’s start by creating the view module that will delegate to the template. In
lib/user_admin_web/views/user_view.ex let’s add the following boilerplate:
defmodule UserAdminWeb.UserView do
  use UserAdminWeb, :view
end
Then let’s create the actual template in
lib/user_admin_web/templates/user/new.html.leex. We’ll start with basic HTML
and then replace it with Phoenix.HTML niceties after.
<h2>New User</h2>
<form>
  <fieldset>
    <label for="nameField">Name</label>
    <input type="text" id="nameField" />
    <label for="roleField">Role</label>
    <select id="roleField">
      <option value="admin">Administrator</option>
      <option value="mod">Moderator</option>
      <option value="user">User</option>
      <option value="guest">Guest</option>
    </select>
    <div>
      <input type="submit" value="Create" />
    </div>
  </fieldset>
</form>
Then let’s get it actually displaying by modifying our UserLive.New module to
render our template instead of the empty one:
defmodule UserAdminWeb.UserLive.New do
  use Phoenix.LiveView
  alias UserAdminWeb.UserView
  ...
  def render(assigns) do
    UserView.render("new.html", assigns)
  end
end
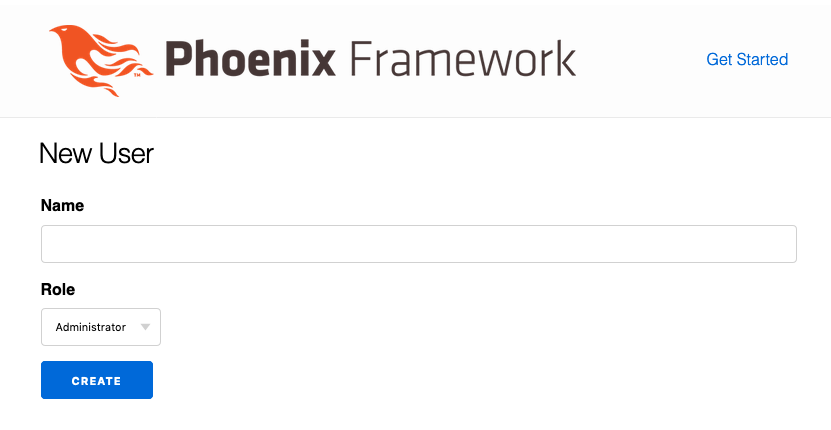
Now if you go to http://localhost:4000/users/new you should see something that looks like this:
Phoenix.HTML
Phoenix includes some really nice helper methods to make our HTML form a little
cleaner. Let’s take advantage of those. To start, we’ll want to create a
changeset that the form can operate off of. To start, let’s add a function to
UserAdmin.Users.User that will allow us to get a changeset for a user:
defmodule UserAdmin.Users.User do
  ...
  import Ecto.Changeset
  ...
  def changeset(user, changes \\ %{}) do
    user
    |> cast(changes, [:name])
    |> validate_required([:name])
  end
end
You may notice that we’re only casting and validating the name on the user.
We’ll get into how to save the role in a little bit. Now let’s create a function
in UserAdmin.Users that will allow us to get that changeset without calling
the schema module directly:
defmodule UserAdmin.Users do
  alias UserAdmin.Users.User

  @doc """
  Create a changeset to change a user.
  """
  @spec change_user(User.t(), map()) :: Ecto.Changeset.t()
  def change_user(user, changes \\ %{}) do
    User.changeset(user, changes)
  end
end
And then let’s use it in UserAdminWeb.UserLive.New. We want to create the
changeset when the admin first loads the live view, so let’s set it up in the
mount function like this:
defmodule UserAdminWeb.UserLive.New do
  ...
  alias UserAdmin.Users
  alias UserAdmin.Users.User

  def mount(_session, socket) do
    changeset = Users.change_user(%User{})

    {:ok, assign(socket, changeset: changeset)}
  end
  ...
end
Now we can actually modify the template to use it. We’ll replace the <form>,
<label>, and <input> elements, but while we’re at it, let’s hook the form up
to our live view. We’ll add the phx_submit attribute to our form to tell it to
submit using LiveView, and we’ll use phx_disable_with on our submit button so
that it will prevent admins from trying to create the user multiple times:
<h2>New User</h2>
<%= f = form_for @changeset, "#", phx_submit: :create %>
  <fieldset>
    <%= label f, :name, for: "nameField" %>
    <%= text_input f, :name, id: "nameField" %>

    <label for="roleField">Role</label>
    <select id="roleField">
      <option value="admin">Administrator</option>
      <option value="mod">Moderator</option>
      <option value="user">User</option>
      <option value="guest">Guest</option>
    </select>

    <div>
      <%= submit "Create", phx_disable_with: "Creating..." %>
    </div>
  </fieldset>
</form>
If you reload your browser, the form should look exactly the same, but now if
you submit the form, it will turn red and show a spinner. If you check your app,
you’ll see an UndefinedFunctionError that says that
UserAdminWeb.UserLive.New.handle_event/3 is undefined or private. Let’s set
that up so that we can actually create a user.
Creating Users
Let’s start by creating the function in our context that will actually save the
user. So in UserAdmin.Users go ahead and add create_user/1:
defmodule UserAdmin.Users do
  alias UserAdmin.Repo
  ...
  @doc """
  Create a user.
  """
  @spec create_user(map()) :: {:ok, User.t()} | {:error, Ecto.Changeset.t()}
  def create_user(attrs) do
    %User{}
    |> User.changeset(attrs)
    |> Repo.insert()
  end
end
Now let’s hook it up to the live view. We’ll need to add the handle_event/3
function that the app was looking for when we submitted the form. We’ll want to
call our new Users.create_user/1 function, and then clear the form and display
a message if the creation was successful. If there was an error, we’ll want to
display an error message:
defmodule UserAdminWeb.UserLive.New do
  ...
  alias UserAdminWeb.Router.Helpers, as: Routes
  ...
  def handle_event("create", %{"user" => attrs}, socket) do
    case Users.create_user(attrs) do
      {:ok, user} ->
        socket =
          socket
          |> put_flash(:info, "User successfully created")
          |> redirect(to: Routes.live_path(socket, __MODULE__))

        {:noreply, socket}

      {:error, changeset} ->
        {:noreply, assign(socket, changeset: changeset)}
    end
  end
end
We’re assigning the error changeset to the socket, but we need to actually
display the errors. So let’s modify our template to add an error_tag after the
text_input to be displayed when there are errors in the changeset:
...
    <%= text_input f, :name, id: "nameField" %>
    <%= error_tag f, :name %>
...
Now if you refresh your browser you should be able to submit the form. Try submitting it with an empty name field to make sure the error shows, and then with something in the name field to make sure the success message shows.
With that we have successfully built a user creation form! If you look at the running application, you’ll see that we’re doing an insert into the database, but you’ll also notice that it only sends the user’s name, but not the selected role. Let’s change that so that we’re working with roles too.
Listing Roles
Our roles probably won’t change very often, so let’s just put them directly into
the database. We’ll do that in our priv/repo/seeds.exs file:
alias UserAdmin.Repo
alias UserAdmin.Users.Role

roles = ~w(Administrator Moderator Editor User Guest)

Enum.each(roles, fn name ->
  Repo.insert!(%Role{name: name})
end)
Then go ahead and run the seeds with mix run priv/repo/seeds.exs. Now your
database will have five different roles. Feel free to add more if you wish.
There is one more role than what we put in HTML in the template, so let’s go
ahead and get the template displaying the roles from the database instead. First
let’s make a function in our Users context that will let us get all the roles:
defmodule UserAdmin.Users do
  alias UserAdmin.Repo
  alias UserAdmin.Users.{Role, User}
  ...
  @doc """
  List all the roles in the database.
  """
  @spec list_roles :: list(Role.t())
  def list_roles do
    Repo.all(Role)
  end
end
Now let’s set up your live view to use this new function and pass it into the template:
defmodule UserAdminWeb.UserLive.New do
  ...
  def mount(_session, socket) do
    changeset = Users.change_user(%User{})
    roles = Users.list_roles()

    {:ok, assign(socket, changeset: changeset, roles: roles)}
  end
  ...
end
And finally, let’s tell swap out the last <label> and the <select> element
in the template using the Phoenix.HTML helpers. The select function expects
a keyword list or list of two-item tuples with the item to display and the key
to be sent to the backend, so we’ll need to use Enum.map to convert our list
of Role structs into tuples as well. And let’s add an error_tag in case any
errors need to be displayed for the role. Oh, one last thing before we add the
HTML: we’ll just be using the role_id to determine the role, rather than using
the role itself. That’s because it will have the name and everything on it,
but we just want to use the ID for the key:
<h2>New User</h2>
<%= f = form_for @changeset, "#", phx_submit: :create %>
  <fieldset>
    <%= label f, :name, for: "nameField" %>
    <%= text_input f, :name, id: "nameField" %>
    <%= error_tag f, :name %>

    <%= label f, :role_id, for: "roleField" %>
    <%= select f, :role_id, Enum.map(@roles, &{&1.name, &1.id}), id: "roleField" %>
    <%= error_tag f, :role_id %>

    <div>
      <%= submit "Create", phx_disable_with: "Creating..." %>
    </div>
  </fieldset>
</form>
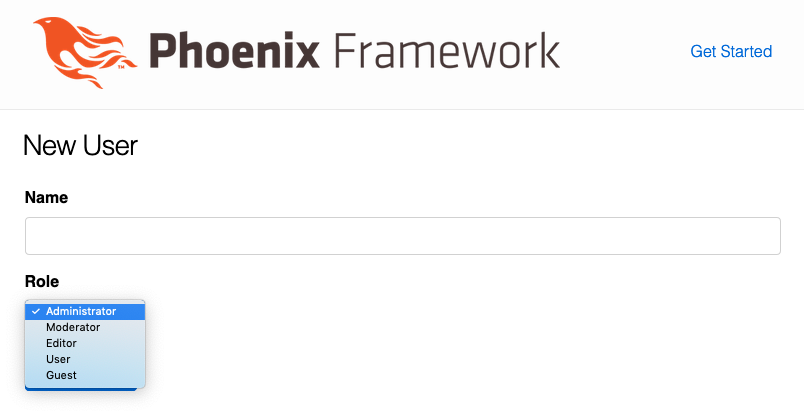
Now if you refresh your browser and open the dropdown, you should see 5 options instead of 4!
You can try saving another user, but if you look in the database,
you’ll see that their role ID is nil. So let’s get them saving.
Saving Roles
This should be the simplest step. We need to change our
changeset function for the User schema so that it will accept a role_id.
Let’s do that in lib/user_admin/users/user.ex:
defmodule UserAdmin.Users.User do
  ...
  def changeset(user, changes \\ %{}) do
    user
    |> cast(changes, [:name, :role_id])
    |> validate_required([:name, :role_id])
  end
end}
And with that, we’re successfully saving both a user’s name and their role, and effectively making use of a one-to-many relationship. Finally, let’s make a user list so that we can watch new users being created and display the role that was chosen for them.
The User List
In order to get our list of users, let’s start by adding a new function to our
Users context to allow us to get a list of all our users:
defmodule UserAdmin.Users do
  ...
  @doc """
  List all users in the database.
  """
  @spec list_users :: list(User.t())
  def list_users do
    Repo.all(User)
  end
end
Then let’s add a new live view at
lib/user_admin_web/live/user_live/index.ex. We’ll use our new list_users
function to get all the users when the live view is mounted:
defmodule UserAdminWeb.UserLive.Index do
  use Phoenix.LiveView
  alias UserAdmin.Users

  def mount(_session, socket) do
    users = Users.list_users()

    {:ok, assign(socket, :users, users)}
  end

  def render(assigns) do
    ~L""
  end
end
Then hook it up in lib/user_admin_web/router.ex:
defmodule UserAdminWeb.Router do
  ...
  scope "/", UserAdminWeb do
    pipe_through :browser

    live "/users", UserLive.Index
    live "/users/new", UserLive.New
  end
end
And now let’s go ahead and create a template for it at
lib/user_admin_web/templates/user/index.html.leex. We’ll want to use a for
comprehension to loop over all of our users and add them to a <table>:
<h2>Users</h2>
<table>
  <thead>
    <th>Name</th>
    <th>Role</th>
  </thead>
  <tbody>
<%= for user <- @users do %>
    <tr>
      <td><%= user.name %></td>
      <td><%= user.role.name %></td>
    </tr>
<% end %>
  </tbody>
</table>
Now let’s hook it up to our live view:
defmodule UserAdminWeb.UserLive.Index do
  ...
  alias UserAdminWeb.UserView
  ...
  def render(assigns) do
    UserView.render("index.html", assigns)
  end
end
At this point if you navigate in your browser to
http://localhost:4000/users, you would expect to
see a table of users, but instead we get a nice error saying that the role
isn’t loaded. That’s because our list_users function isn’t pulling in the
users’ roles. We’ll need to do that using Repo.preload in our Users context:
defmodule UserAdmin.Users do
  ...
  def list_users do
    User
    |> Repo.all()
    |> Repo.preload(:role)
  end
end
Now if you refresh, it will work if all your users have roles on them. Now that
we’ve added the role_id to validate_required in our changeset function, we
shouldn’t have any more users added without roles. So rather than trying to
change our code to accomodate this case, let’s just reset our database so that
we can start clean and get rid of the bad record(s):
mix ecto.reset
After that, you can refresh the page and you should see an empty users table. Go back http://localhost:4000/users/new and add a user or two. Then come back and your table should have a couple of users with their roles showing.
Preloading the role will work pretty well, but currently it will hit the database once to get all the users and then again to get all their roles. We can make that a little bit more performant with a join:
defmodule UserAdmin.Users do
  import Ecto.Query
  ...
  def list_users do
    User
    |> join(:inner, [u], r in assoc(u, :role))
    |> preload([_, r], role: r)
    |> Repo.all()
  end
end
You’ll want to look more at the performance cost of doing joins in all cases, but in this particular case it will save a round trip to the database and improve our performance a tiny bit.
Make it Work in Real-Time
At this point, we’re using Phoenix LiveView, but we aren’t really taking
advantage of the real-time capabilities of websockets and Channels. Let’s use
Phoenix.PubSub so that our user list can subscribe to the list of users and
automatically update when new users are created. Because we used the Phoenix
generator to set up our app initially, it will have already set up
UserAdmin.PubSub for us to use.
We’ll start by adding a subscribe function in our Users context that will
allow us to subscribe to events from the context, and then publish an event
whenever a new user is created:
defmodule UserAdmin.Users do
  ...
  @topic inspect(__MODULE__)
  ...
  def create_user(attrs) do
    %User{}
    |> User.changeset(attrs)
    |> Repo.insert()
    |> broadcast_change([:user, :created])
  end
  ...
  @doc """
  Subscribe to updates to the user list.
  """
  @spec subscribe :: :ok | {:error, term()}
  def subscribe do
    Phoenix.PubSub.subscribe(UserAdmin.PubSub, @topic)
  end

  @spec broadcast_change({:ok, User.t()}, list(atom())) :: {:ok, result}
  defp broadcast_change({:ok, result}, event) do
    Phoenix.PubSub.broadcast(UserAdmin.PubSub, @topic, {__MODULE__, event, result})

    {:ok, result}
  end
end
Now events are being published, so we just need to tell our live view to
subscribe to those and update the template whenever they are. Subscribing is
pretty easy, but then we’ll need to add a handle_info function to handle
PubSub messages whenever they’re received:
defmodule UserAdminWeb.UserLive.Index do
  ...
  def mount(_session, socket) do
    Users.subscribe()
    ...
  end
  ...
  def handle_info({Users, [:user | _], _}, socket) do
    users = Users.list_users()
    {:noreply, assign(socket, users: users)}
  end
end
And with that, try opening one browser window on http://localhost:4000/users and with the other window open to http://localhost:4000/users/new try creating a couple users. You should see them show up immediately on the list!
So there you have it. Working with one-to-many associations in real-time. Keep this code on your machine because we’ll continue building off of it in part 2 when we go over many-to-many relationships. Those ones are a little more difficult, so I’d prefer that we already have the boilerplate out of the way so we can just focus on making many-to-many relationships work.
If you’d like an exercise for the meantime, I’d recommend making another live
view to add new roles and use UserAdmin.PubSub to make the new roles show
automatically in the dropdown when they’re created without having to refresh the
page.
Let me know how this went
As always, I’d love to hear how this tutorial went for you. Did you get stuck anywhere? Have questions about anything I said? Wish I would write/make a video about a different topic? Let me know on Twitter!. Or if you prefer, leave a comment on the video above on YouTube. Either way, I’ll try to get back to you quickly.
Thanks for reading and/or watching. If you liked this post, please retweet it so others can find it. Also, subscribe to my email list below and my YouTube channel so you can see the new videos right away.